CLEANING HOUSE
Apr 2026-TEAM PROJECT (16 People)
Genre: First-Person Horror Roguelite Extraction Shooter
Game Length: 15~30 mins
The video may take a moment to load. Please wait.
视频可能需要片刻加载,请稍候。
Project Highlights (00:42)
A 42-second overview of my gameplay, level design, prototyping, and level-production work on Cleaning House.
TEAM MEMBERS - Blue Light Studio
.png)
PLATFORM: PC/STEAM
MY Role: Level & Gameplay Designer
SOFTWARE: Unreal Engine 5, Project Graph, Google Docs
MY WORK:
+ Level Design
+ Design gameplay & features
+ Building the gymnasium & setting metrics
+ Blueprint Prototyping & Debugging
+ Building level whitebox
+ Setting Level Production Workflow
+ Environment Art & Lighting
PROJECT OVERVIEW
Cleaning House is a first-person horror roguelite Extraction shooter developed by a 16-person capstone team in Unreal Engine 5 and released on Steam. Players fight through a procedurally assembled hotel, collect weapons and upgrades, and decide whether to continue deeper into the run or evacuate with the resources they have earned.
The original project concept came from an idea I proposed, which the team selected. I worked primarily as a Level & Gameplay Designer, contributing to the core game loop, system design, level whiteboxes, gameplay prototypes, and the production workflow that took rooms from blockout to final environment art and lighting.
REFERENCE GAME
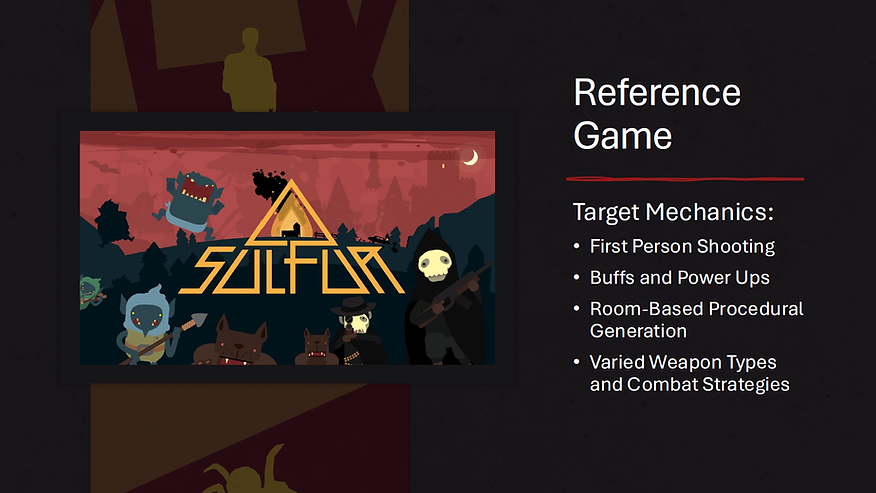
The team used SULFUR as an early reference for first-person combat, buffs and power-ups, room-based procedural generation, and weapon variety. Rather than directly reproducing its systems, I used it as a starting point to break down the gameplay structure and explore how those ideas could support our horror roguelite experience.
After the team selected the project concept, one of my first tasks was to break the reference game down into individual gameplay features and identify which systems were essential to making our own game function.
I organized the features by production priority through color: core features required for the game to work, systems that formed the core gameplay loop, and lower-priority features that could support future content. This gave the team an early framework for discussing scope, dependencies, and what to prototype first.
The goal was not to reproduce every feature from the reference. The breakdown gave me a framework for deciding what our game actually needed and what we could remove, modify, or develop differently.
FIRST PROTOTYPE: Validate Feasibility


First playable Prototype & Gymnasium
Once the feature breakdown established an initial production baseline, the team began implementing the core systems for the first playable prototype. While engineering built those systems, I focused on creating simple spaces to test whether the basic room-based structure worked in practice.
I built an LV_Gym and three basic room layouts—L-shaped, I-shaped, and T-shaped—using rough blockout dimensions for walls, cover, and playable space. I also created simple Blueprint prototypes for enemy placement, loot-box placement, and spawn points so we could test combat and content distribution before the final systems were ready.
At this stage, the goal was not to define the final production standard. It was to prove that the basic room structure was playable and could support the gameplay systems the team was building.
SECOND PROTOTYPE: Building Workflow & Game Systems


Setting Basic Modular Level Workflow & Production Metrics
After the first prototype proved that the basic room structure was playable, the next problem was production: how could multiple level designers and artists build rooms that remained consistent in scale and could be converted into final environments efficiently?
I worked with the art team to establish practical dimensions for walls, floors, doors, cover, and other reusable architectural elements. The goal was to turn the rough prototype scale into a shared production standard that both Level Design and Environment Art could work from.
With the dimensions established, I rebuilt the room structure around reusable modular components rather than one-off blockout meshes. Each whitebox element was designed to match a production asset, so walls, floors, doors, and other pieces could be replaced with final art with minimal layout changes.
I tested this workflow inside the Gymnasium by rebuilding the existing rooms with the modular kit. Once the process proved workable, it became the foundation for moving rooms from Whitebox into Environment Art without rebuilding the level structure from scratch.
At this point, the Gymnasium was no longer only a gameplay test space. It also became a production testbed where I could verify whether room layouts, modular dimensions, gameplay content, and art replacement could work together before the team scaled up level production.


Reconstructed Gameplay & System Design Based On Ref Game
Once I proved the basic level-production workflow, I returned to the broader gameplay structure. By then, the project had already removed or changed several systems from SULFUR, and simply following the reference no longer described the game we were building.
I began redesigning the core systems around a more traditional roguelite structure while keeping the extraction element. I mapped out how combat, ammunition, inventory, loot, temporary upgrades, persistent resources, and evacuation should interact, then used these diagrams to communicate the intended gameplay structure with the engineering team.
These diagrams became a shared design reference for discussing how individual features should connect rather than be implemented as isolated systems.
One of the biggest changes was simplifying the economy by combining currency and ammunition into a single resource. Instead of using conventional money, the player's ammunition also became the game's currency. Players could sell valuable items extracted from a run at the base for more ammunition.
This created a direct relationship between combat power and economy. Players could choose to spend more ammunition to increase weapon damage, but doing so also meant consuming a resource that could otherwise be saved for future runs.
Death carried a high cost: players lost the resources and items they were carrying, along with any temporary Buffs gained during the run. A successful evacuation let players keep the items and ammunition they extracted, but temporary Buffs still reset.
Because of this persistence system, the player base included storage for weapons and ammunition, allowing players to deposit resources before a run and withdraw them before the next one.
ALPHA: From Design Framework To Production
With the core gameplay direction established, my work gradually shifted from building the initial framework to translating design intent into production-ready requirements for engineering and art.
During Alpha, I worked across system specifications, asset requirements, gameplay prototypes, and in-engine integration to keep design, engineering, and art aligned as the project moved toward the Vertical Slice.
As the prototype became more complete, I began turning the high-level system diagrams into more detailed implementation requirements. One major focus was the Inventory system, where I defined how weapons, ammunition, backpacks, consumables, valuables, and storage should behave within the larger roguelite and extraction loop.
Instead of communicating these requirements only through meetings, I used diagrams, annotated screenshots, slides, and tables to show the engineering team how each interaction should work and what needed to change in the current implementation.


Inventory System Design & Communication Process

Prototyping Before Production:
When a design requirement could be tested quickly in Blueprint, I often built a temporary prototype instead of waiting for the programming team's final production system.
For example, I modified the blockout loot-box setup so that opening a chest could randomly generate items. This gave us an early way to test loot distribution and room content before the final data-driven spawning system was ready.

Translating Level Needs Into Art Tasks:
As level production expanded, I also needed a clearer way to communicate what the levels required from the art team. I created a prioritized asset requirements list so artists could see which props and architectural pieces mattered most to gameplay and level production.
For assets with specific gameplay or spatial requirements, I used annotated references and visual documentation to communicate dimensions, shapes, intended use, and placement needs rather than simply requesting “a prop.”
VERTICAL SLICE: Cross-Discipline Integration


As production moved toward the Vertical Slice, my role became increasingly focused on integration. I updated the level layout and built the Start and End areas to temporarily support the tutorial and post-level flow while the Lobby was still under development. Players could take the elevator from the End Area and seamlessly return to the Start Area, temporarily serving the function originally planned for the Lobby.
I also created supporting Blueprints such as the Connection Door and randomized paintings, and packaged lighting assets into reusable Blueprints.
This stage required me to work at the intersection of Level Design, Art, and Engineering—taking assets and systems from different disciplines and ensuring they worked together in a playable level.
Filling Production Gaps


As the Vertical Slice approached, some production needs fell outside each discipline's available capacity. When those gaps directly blocked level completion, I stepped in where I had the skills to keep the level moving forward.
My supporting work included environment art, simple blockout and item models, Blueprint lighting, randomized painting systems, item-spawning prototypes, debugging existing features, and preparing level content for the final presentation.
I also recreated an existing 2D concept using available in-engine assets for presentation, translating its composition and mood into a 3D environment.
From Prototype To Production System


Some of my early Blueprint prototypes were later replaced or adapted as production systems became available. For example, I migrated the chest's item-spawning logic from a temporary Blueprint array to a data-table-driven production system. This required adapting existing level content while ensuring that previously built rooms continued to work with the final implementation.
BETA — Reconstructing The Game Flow
After the Vertical Slice, we reassessed the game's scope and structure against the remaining production time and technical constraints. We decided to use design to solve certain production issues. I worked with another designer to develop a more complete Game Flow, from the tutorial and lobby through the normal run structure.
One major change was moving away from treating the run primarily as a sequence of independently generated rooms. Instead, the hotel was organized around Hallways that act as persistent navigation spaces. Players clear the combat rooms connected to each Hallway before unlocking progression to the next floor.
This gave the run a clearer spatial goal: enter a Hallway, choose and clear its rooms, collect rewards and Buffs, then decide whether to continue deeper or return to the Lobby with the resources gained.
*Page In Red Was The Work Of The Other Designer
The Hallway structure solved several problems at once. It gave players a stable spatial reference between generated combat spaces, made progression through the hotel easier to understand, and allowed us to reuse a smaller set of rooms within a clearer overall structure.
It also better matched the fantasy already communicated by the game's visual identity: moving through an unsettling hotel corridor, opening rooms one by one, and gradually progressing deeper into the building.
The new Game Flow also made the long-delayed ProcGen system a direct dependency for level production. When the production requirements were finalized, existing rooms could no longer remain in their original Blueprint format and had to be converted into standalone Levels. I migrated existing room content into the new format, combined modular wall and floor elements where needed, and standardized door positions to match the ProcGen spawn requirements.
LEVEL DESIGN
BUILDING A REPEATABLE LEVEL WORKFLOW
How I Built A Combat Room
01 — DEFINE THE ROOM SHAPE

I began each room with a simple overall shape—such as an I, L, or T layout—then used the modular kit to establish the playable structure and circulation before adding detailed content.
02 — BUILD A READABLE SPATIAL HIERARCHY

The primary route used the largest spaces and highest ceilings, while secondary branches gradually became lower and narrower. Smaller rooms could branch off those spaces again, but remained visually subordinate to the main path.
This created a spatial hierarchy that players could read even when the room contained loops or multiple routes.

Whenever possible, secondary routes reconnect to the main circulation instead of ending in arbitrary dead ends. This lets players explore without constantly backtracking and makes loop-shaped layouts easier to understand.
Symmetrical layouts created an additional navigation risk: the entrance and exit could easily look identical. I deliberately differentiated major areas through composition, props, lighting, and architectural details so players had visual landmarks for orientation.
Once the spatial structure was readable, I placed enemy encounters, loot and rewards, furniture blockouts, and initial lighting. At this stage, furniture was primarily used as gameplay geometry—cover, sightline control, route separation, or spatial landmarks—rather than final decoration.
03 — PLAYTEST FOR ITERATION


Readability — Before & After Iteration
Readability was the first focus point. Playtesting then checked whether players could distinguish different parts of the room and remember where they had already been. I reinforced room identity through ceiling height, wallpaper and floor materials, lighting, and major furniture arrangements.
Once the gameplay layout was stable, the Environment Artist could take over, replacing the furniture blockouts with final assets while preserving the intended scale and spatial function.


Once we integrated the Hallway structure into the full game, the overall run became longer than intended. Larger combat rooms increased the time spent on each floor and made repeated room appearances more noticeable.
Based on player feedback, I broke the larger L- and T-shaped layouts into several medium-sized room variants with modified main path. The goal was to shorten individual encounters, increase the effective variety available to ProcGen, and reduce fatigue from repeatedly seeing the same large spaces.
RETROSPECTIVE & TAKEAWAYS
1. VALIDATE PIPELINE-DEPENDENT SYSTEMS EARLY
One of my biggest lessons was that identifying a production risk is not the same as managing it. Systems such as ProcGen directly defined how rooms needed to be authored, but the final workflow was validated after level production had already begun. I identified the problem early in development, but I didn't keep escalating it as a core priority or clarify who would own it. This created avoidable migration and rework later in development.
In a future project, I would validate pipeline-defining systems with one representative room before scaling content production—proving Level Design, ProcGen, AI, art replacement, and packaging together as an end-to-end workflow.
2. TEST THE FULL EXPERIENCE, NOT ONLY INDIVIDUAL ROOMS
A room can work well in isolation and still create pacing problems once it becomes part of the full game. After the Hallway structure was integrated into the full game, the same large rooms that worked individually made the overall run longer and increased the feeling of repetition.
This taught me to evaluate level content at multiple scales: individual encounter readability, room pacing, floor pacing, and the rhythm of the entire run.
3. A LEVEL WORKFLOW SHOULD PROTECT DESIGN INTENT
I learned that a good level-production workflow isn't just about making content faster—it should preserve design intent as the level moves between disciplines.
Shared metrics, modular assets, gameplay blockouts, visual hierarchy, and a clear art handoff let key spatial decisions—routes, sightlines, cover, landmarks, and room identity—carry over from Whitebox to final environment art.
4. OWNERSHIP DOES NOT MEAN DOING EVERYTHING YOURSELF
Because I cared strongly about the project, my early instinct was often to solve production gaps myself—building prototypes, debugging systems, creating missing blockout assets, or stepping into environment art when those tasks blocked level progress.
The project taught me that this approach is useful in the short term but not sustainable long term. In a larger team, ownership also means making dependencies visible, defining responsibilities and handoff criteria, documenting decisions, and escalating blockers early enough for the team to solve them together.